
A friend called me up after he had his windows replaced. While the windows were great, the trim had developed some issues during the process. The siding under the window had been pushed out by the spray foam insulation that the window installers used to seal around the replacement window. In addition, some of the other pieces of siding had been damaged at the ends where the siding butts up against the window trim. All of this, of course, exposed the wall to the weather and needed to be repaired.
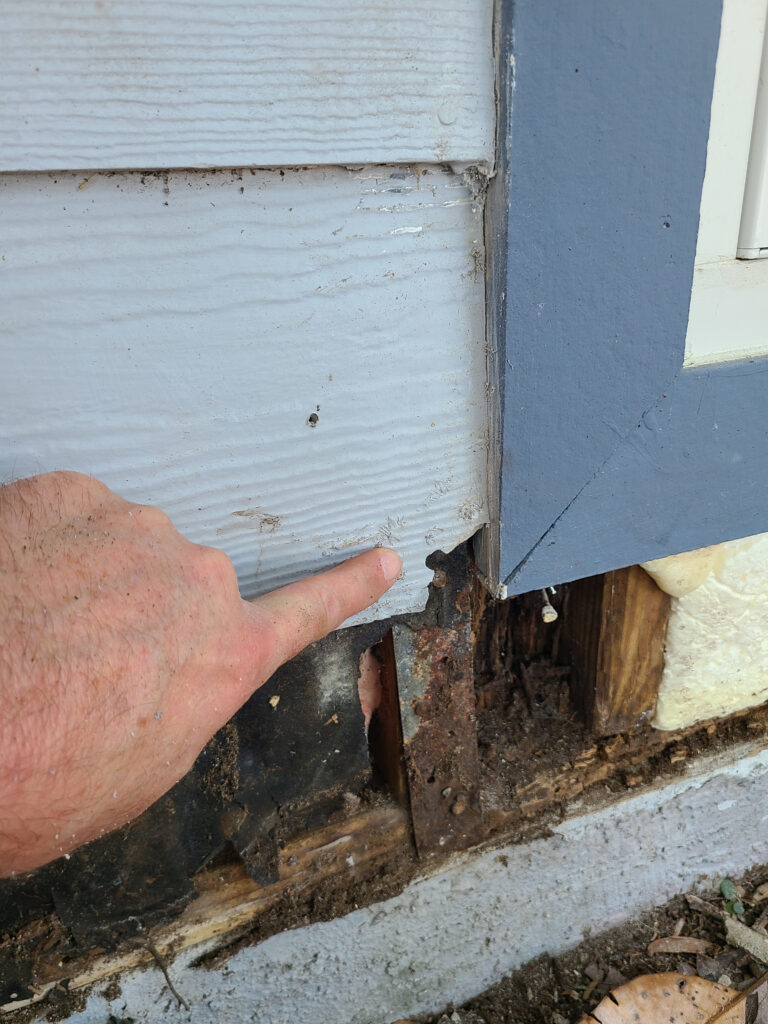
One additional concern was that, before the window was replaced, rain had found it’s way in behind the siding at one of the corners, causing some wood rot in some of the framing. Prior to reaching out to me, the homeowner had contacted a general contractor to inspect and assess the damage for any structural issues. Thankfully, the wood rot was isolated to the cripple studs, so there were no concerns.
My first order of business was to carefully remove the bottom piece of siding from the rest without damaging the rest of the siding above. It was a tricky process, which was mostly successful. I did end up breaking off more of the second row of siding than I was comfortable with. So, I ultimately ended up replacing the second row of siding too. But I’m jumping ahead.
Next, I had to trim back the spray foam insulation to so that the siding board would lay flat up against the cripple studs under the window. This was easily accomplished using a reciprocating cut-off saw, which works great with projects like this.
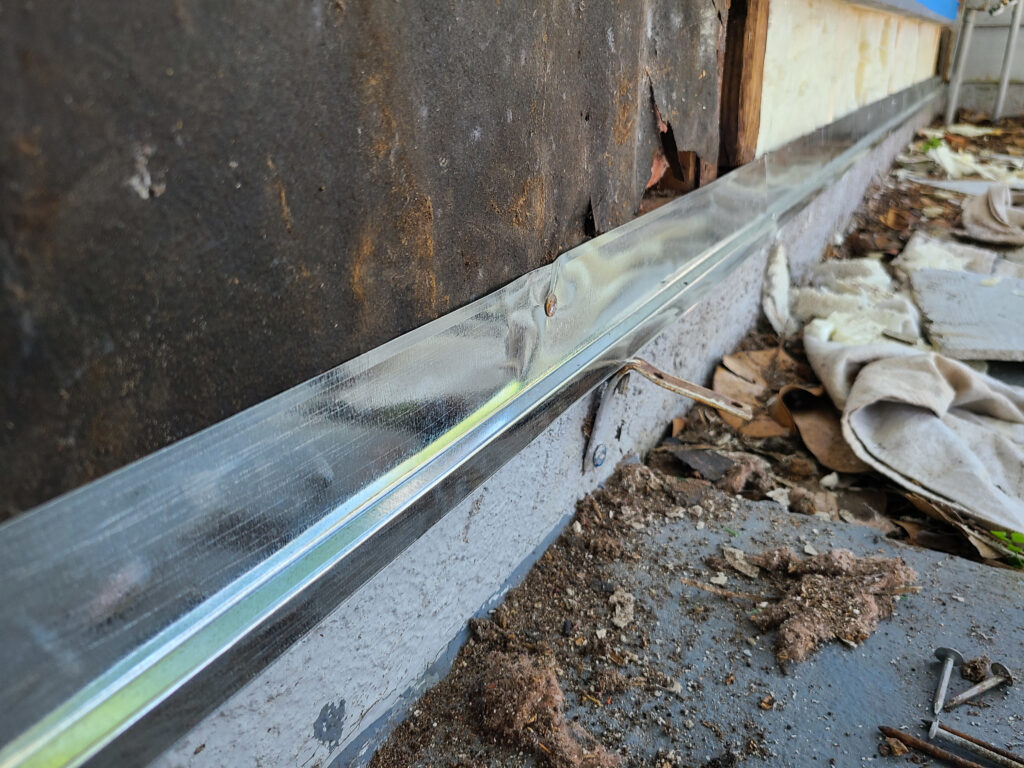
After that I added two overlapping strips of z-flashing behind the bottom row of siding just above the foundation. This would prevent any rain from penetrating the wall as it ran down the siding at the foundation level. Any water would be pushed out away from the house.
After the z-flashing was in place, I cut the siding to length and then notched it to fit around the window. It was a slow, tedious process, but that’s what it takes to make it fit right. It was a great fit.
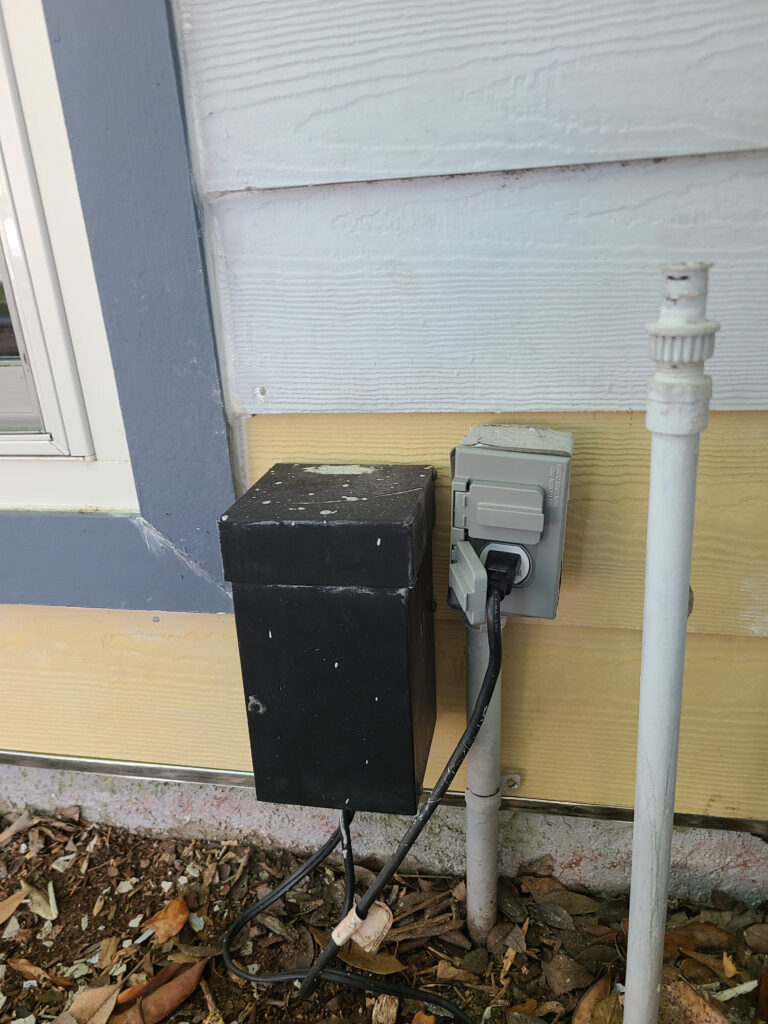
The second row of siding required a little bit of finessing as the electrical wiring to the exterior outlet penetrated the siding in the middle of the board. But with some patience, I was able to get a good fit.
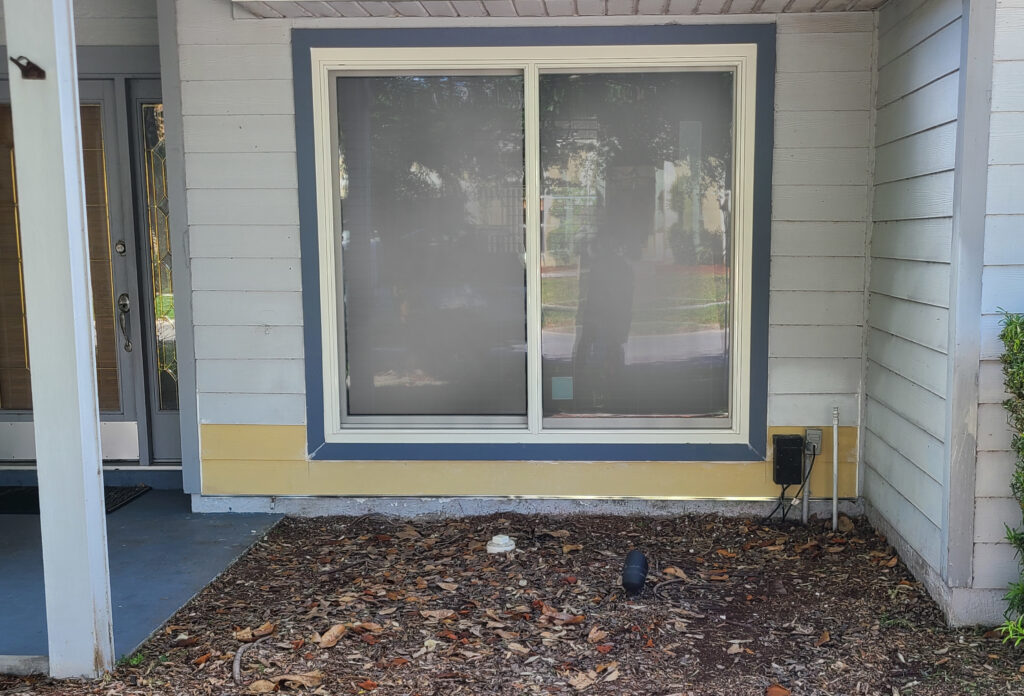
Once all the pieces of siding were cut to size, I nailed everything in place. All the nail heads were caulked. And any joints between the trim and siding were caulked as well, making the wall weather tight again.
In the end, the job turned out really well, and the homeowner was pleased with the work. I call that a good day!

As always, thanks for reading about this project. I hope you enjoyed the post and learned something new.
If you’re in the Oviedo, Florida area and have a project you really don’t want to tackle yourself, I would be happy to stop by, take a look at what you have going on, and discuss possible options that might work for you.
I thoroughly enjoy producing quality work and making sure that you’re satisfied with the project before I leave. It’s the only way I want to do business.
To book a free estimate, click the button below.